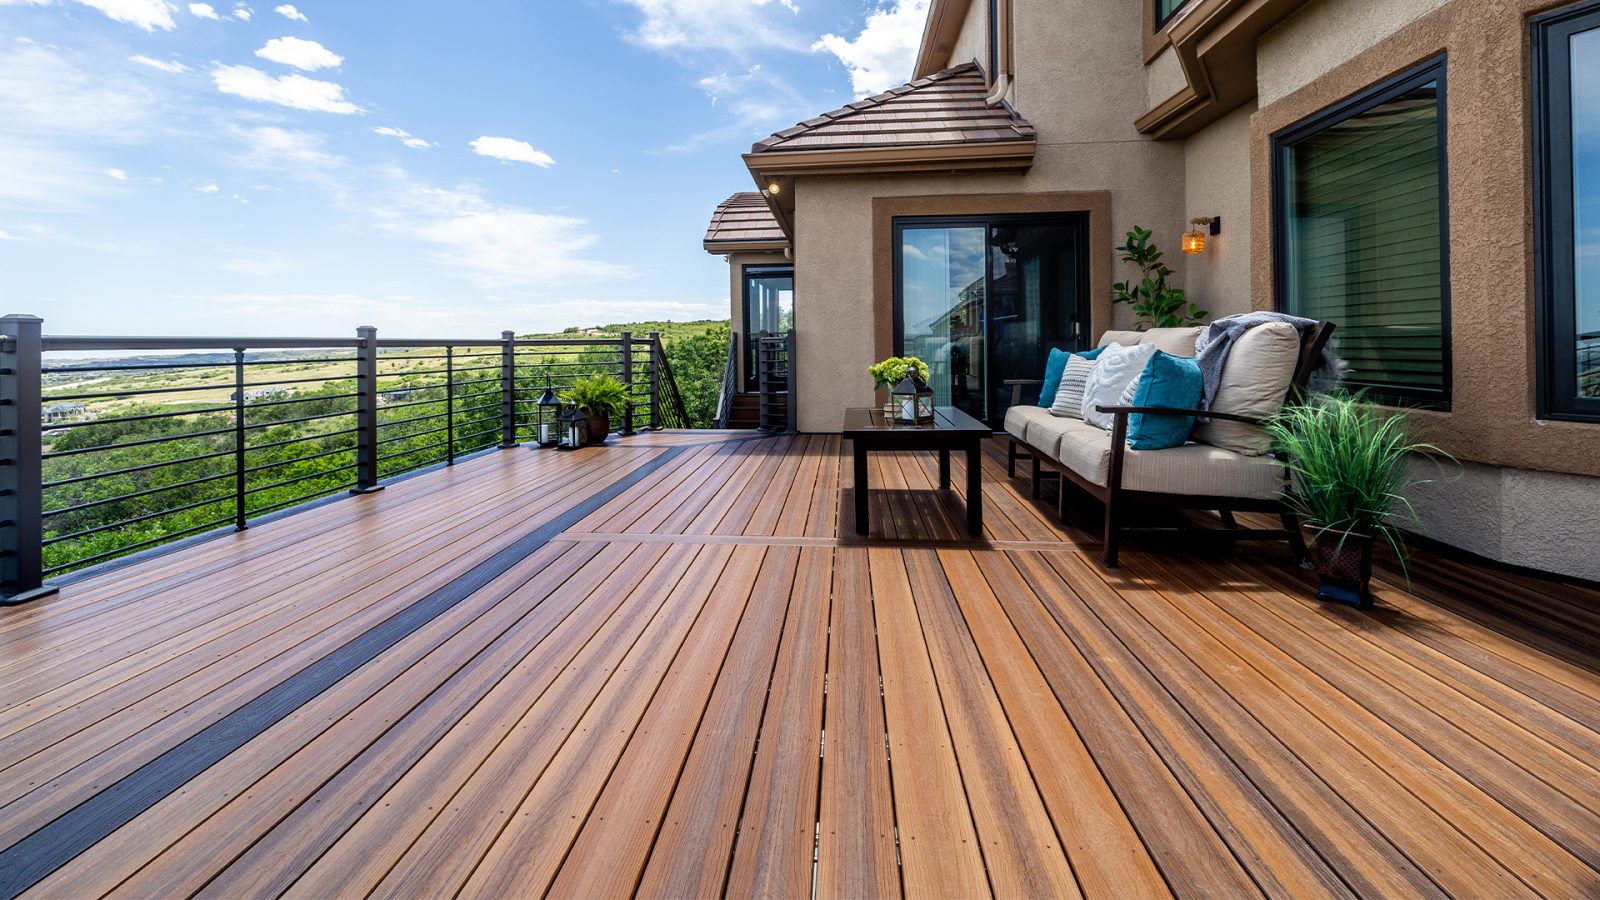
A wood deck is an extension of your home—a stage for summer barbecues, quiet morning coffees, and stargazing on warm nights. But exposed to relentless sun, rain, snow, and foot traffic, even the most robust timber will eventually show its age. The vibrant color fades to a dull, weathered gray, and the surface may become rough, splintered, and unprotected. Refinishing your deck isn’t just about aesthetics; it’s a crucial maintenance task that shields your investment from rot, decay, and insect damage, significantly extending its lifespan.
While the process is labor-intensive, it is overwhelmingly a DIY-friendly project. Success doesn’t hinge on advanced skill but on patience, preparation, and choosing the right materials. This guide will walk you through the entire process, from selecting the perfect finish to applying the final coat, ensuring your deck reclaims its beauty and strength for years to come.
What You’ll Need
Gathering all your tools and materials before you start is non-negotiable. There’s nothing worse than being halfway through a critical step and having to run to the hardware store. Here’s your comprehensive checklist:
Safety Gear (Non-Negotiable):
-
Safety glasses
-
Hearing protection (for power tools)
-
A NIOSH-rated respirator mask (N95 or P100 for sanding and chemical application)
-
Heavy-duty work gloves
-
Sturdy, closed-toe shoes
Cleaning and Stripping Supplies:
-
Deck cleaner: Choose a quality concentrate designed for your deck’s issue (e.g., mildew removal, brightening).
-
Deck stripper: Necessary if you are removing an old, peeling solid-color stain or paint.
-
A pump-style garden sprayer for applying cleaners and strippers.
-
A stiff-bristled deck brush (often with a long handle for ergonomics).
-
A power washer. Crucial note: You need a pressure washer with adjustable PSI (pressure). A standard “power washer” is often too weak. You will use this on a low-pressure setting to rinse, not to aggressively blast the wood.
Sanding and Surface Preparation Tools:
-
Deck sander: For large surfaces, a random orbital sander is ideal for finish sanding. For extensive restoration, you might rent a floor drum sander for the deck boards and an edge sander for the gaps and corners.
-
Sanding discs and pads in various grits (e.g., 80-grit for heavy work, 120-grit for final smoothing).
-
A sanding block or hand sander for detail work, railings, and spindles.
-
A putty knife or painter’s tool for scraping loose finish.
-
A hammer and nail set to punch down any protruding nails or replace them with deck screws.
-
Wood filler or epoxy for repairing cracks and holes (ensure it is stainable).
-
A stiff putty knife for applying filler.
Staining and Sealing Supplies:
-
Your chosen stain/sealer (see next section for details on choosing).
-
A paint tray and liner.
-
Application tools: Synthetic pads, brushes, or a sprayer (covered in detail later).
-
Painter’s tape for protecting house siding, vents, and other non-deck surfaces.
-
Drop cloths or plastic sheeting to protect landscaping and furniture.
Choosing Stains and Sealers
This is the most critical decision you will make, as it determines the final look, durability, and maintenance schedule of your deck. The options fall into three main categories:
1. Clear Water Repellents (Transparent Sealers)
-
What it is: A virtually invisible finish that contains mildewcides and water repellents but little to no pigment.
-
Pros: Shows off the natural beauty and grain of the wood. Easy to reapply as it doesn’t require stripping.
-
Cons: Offers the least protection against UV damage. Will not prevent the wood from graying. Requires reapplication every 1-2 years. Not suitable for previously stained decks that have color.
-
Best for: New, high-quality wood (like cedar or redwood) where you want to preserve the original color while repelling water.
2. Semi-Transparent Stains
-
What it is: Contains a small amount of pigment that tints the wood but allows the natural grain and texture to show through clearly.
-
Pros: Excellent balance of beauty and protection. The pigment provides UV protection to slow graying, while the formula still repels water. Hides minor imperfections better than a clear sealer.
-
Cons: Will eventually fade and wear and will need maintenance. Reapplication is needed every 2-3 years, but new coats can often be applied after a simple cleaning.
-
Best for: Most decks. It’s the most popular choice for those who want color options but love the look of natural wood.
3. Solid-Color Stains (and Paint)
-
What it is: Essentially a thin layer of paint with a higher pigment load. It completely covers the wood’s natural grain and color, creating a uniform, opaque finish.
-
Pros: Provides the maximum protection against UV rays and wear. Hides a multitude of sins, including significant discoloration, stains, and imperfections. Longest lifespan, typically 3-5 years or more.
-
Cons: Will eventually crack, peel, and flake like paint, requiring a much more intensive stripping process for future maintenance. Can feel less “natural” than other options.
-
Best for: Older decks with a lot of weathering or discoloration that you want to conceal. Also used for a specific, bold color aesthetic.
Key Consideration: Oil vs. Water Base
-
Oil-Based: Penetrates deeply, often providing superior water protection and a richer color. However, it has strong fumes, longer dry times, and requires mineral spirits for cleanup.
-
Water-Based (Acrylic): Much easier cleanup with soap and water. Lower VOCs (volatile organic compounds), meaning less odor and more environmentally friendly. Dries quickly. Technology has improved to the point that high-quality water-based products offer excellent durability and are now the standard for most DIYers.
Pads vs. Brushes
The tool you use to apply the stain dramatically affects the speed, finish, and your own fatigue level.
Brushes: The Craftsman’s Choice
-
Pros: Unmatched precision and control. A high-quality, synthetic-bristle brush (nylon or polyester) is essential for “cutting in” edges, coating railings, spindles, and getting into the corners and grooves between boards. It works the finish into the wood grain effectively.
-
Cons: Slower application on large, flat surfaces. Can be more tiring on the wrists and hands. Lower-quality brushes can shed bristles.
-
Best Use: Essential for detailed work on railings, balusters, and stairs. Ideal for applying stain to the ends of boards, which is critical for preventing moisture intrusion.
Pads: The Deck Board Workhorse
-
Pros: Incredibly fast and efficient for coating the large, flat surfaces of deck boards. They hold a lot of stain and provide a very even, consistent application with minimal drips. They are also excellent for pushing stain into the gaps between boards.
-
Cons: Not precise enough for vertical spindles or intricate railing details. The pad can wear out over a large project.
-
Best Use: The perfect tool for the main field of the deck. Use a pad applicator with an extension handle to save your back and knees.
The Verdict: Don’t Choose, Use Both.
A professional-grade refinishing job uses the right tool for each part of the deck. Use a pad for the floorboards and a brush for everything else—railings, posts, spindles, and stairs. This hybrid approach ensures both speed and quality.
A Note on Sprayers: While sprayers are fast, they are not recommended for DIYers using semi-transparent stains. They require immense skill to avoid a blotchy, uneven finish, create significant overspray that can affect your house and landscaping, and use more product. They are best left to professionals working with solid-color stains on empty, masked-off properties.
Safety Considerations
This project involves chemicals, power tools, and physical labor. Prioritizing safety is paramount.
-
Respiratory Protection: Sanding wood creates fine dust that is harmful to your lungs. Applying chemical strippers and some oil-based stains releases strong fumes. A NIOSH-rated respirator mask is not a suggestion; it is mandatory equipment.
-
Eye and Ear Protection: Safety glasses protect your eyes from flying debris during sanding and scraping. Hearing protection is crucial when operating loud power tools like Sanders and pressure washers for extended periods.
-
Skin Protection: Wear gloves when handling chemicals, pressure washing, and sanding. Use long sleeves and pants to minimize skin exposure to irritants and the sun.
-
Pressure Washer Caution: A pressure washer is a powerful tool that can cause severe injection injuries. Never point it at yourself, another person, or a pet. Use a fan tip nozzle and keep it at least 8-12 inches from the wood surface to avoid etching and damaging the soft wood grain.
-
Ladder Safety: If your deck is elevated, ensure your ladder is on stable, level ground. Have a helper steady it if possible.
-
Chemical Safety: Read the labels on all cleaners, strippers, and stains. Follow the instructions precisely. Ensure your work area is well-ventilated.
When to Call a Professional
Refinishing a deck is a rewarding DIY project, but it’s not for every situation. Call a professional contractor if:
-
There is Significant Structural Damage: If you find soft, rotting wood that extends beyond a single board, especially on critical structural components like posts, beams, or joists, stop immediately. A professional must assess and repair the structural integrity before any cosmetic work can begin.
-
The Deck Requires Extensive Rebuilding: If numerous boards are rotten, railings are unstable, or the foundation is compromised, the project has moved from refinishing to rebuilding.
-
You Are Physically Unable: The process is physically demanding, involving hours of kneeling, scrubbing, and sanding. Be honest about your capabilities.
-
You Lack the Time or Patience: Rushing the preparation steps is the number one cause of project failure. A professional crew can often complete the job in a fraction of the time.
-
You Want a Spray-Applied Solid Stain: The expertise and equipment needed to do this correctly without damaging your property are typically beyond the scope of a DIYer.
The Step-by-Step Process
-
Inspect and Repair: Punch down nails, replace with screws, and repair any damaged wood.
-
Clean Thoroughly: Apply deck cleaner according to directions, scrub with a stiff brush, and rinse with a pressure washer on a low-pressure setting. Allow the deck to dry completely for at least 24-48 hours.
-
Strip if Necessary: If removing an old opaque stain, apply a chemical stripper, let it sit, and scrub it off. This will likely require a second rinse.
-
Sand: Sand the entire deck to remove the gray, weathered wood fibers and smooth the surface. Start with a coarser grit and move to a finer grit. Remove all dust.
-
Protect Surroundings: Tape off your house and cover plants and furniture.
-
Apply Stain: Stir, never shake, your stain. Using a pad for the floor and a brush for the details, apply a thin, even coat. Work in manageable sections, following the wood grain. Maintain a “wet edge” to avoid lap marks.
-
Allow Proper Dry Time: Respect the manufacturer’s recommended dry time between coats (if applying a second coat) and before moving furniture back onto the deck. This is typically 24-72 hours.
By following this guide, you can transform a tired, weathered deck into a beautiful, protected outdoor living space. The sweat equity you invest will pay dividends in pride, beauty, and longevity for years to come.